Blackmagic OS
The advanced operating system designed for film and television!
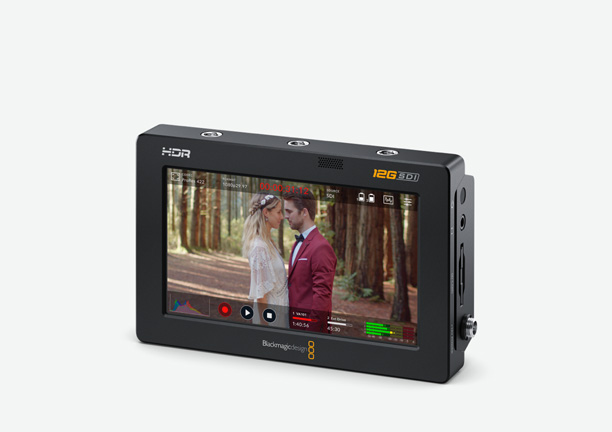
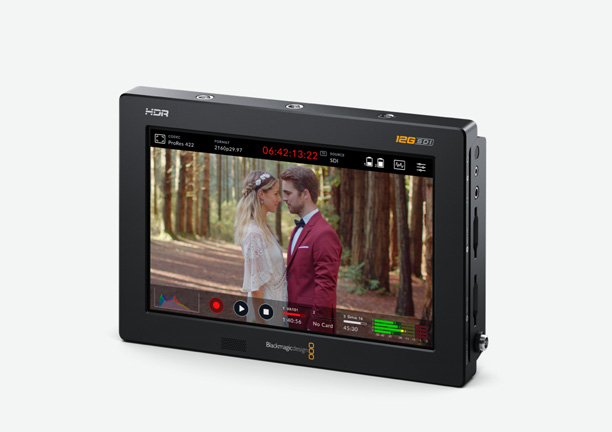
Blackmagic Video Assist features the same advanced Blackmagic OS software as Blackmagic Design's cameras, making them super fast to use and more intuitive than ever! The most important monitoring and recording functions can be accessed with a single tap on the heads up display, there’s an elegant digital slate that makes metadata entry a breeze and a dashboard that uses simple tap and swipe gestures for record settings, monitoring, audio, setup and 3D LUTs. Each feature runs as a separate high performance app on top of Blackmagic OS, making it incredibly stable so you can capture mission critical shoots with confidence. Best of all, it’s upgradable so we’ll be able to add even more great features in the future!
Find ResellerHeads Up Display
Instantly see and adjust the most important settings with a single tap!
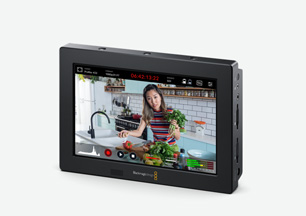
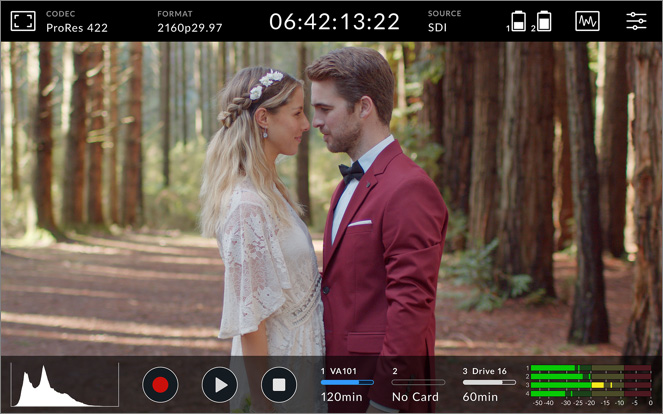
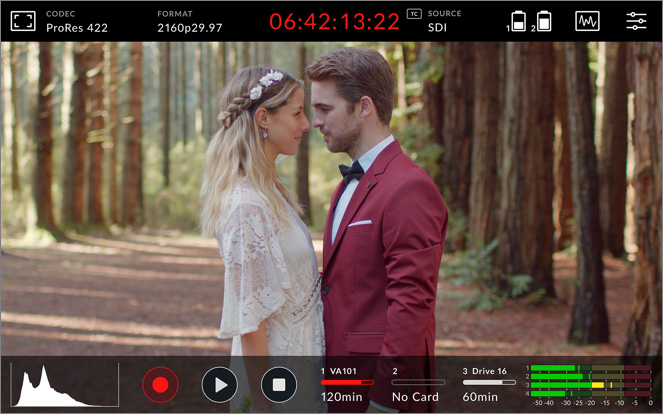
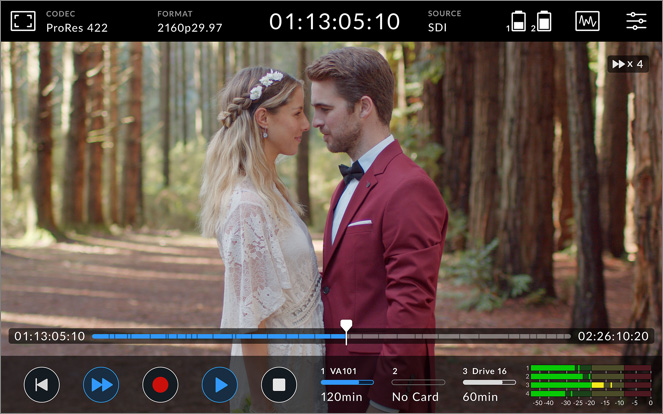
The interactive heads up display, or HUD, lets you quickly access the most important settings, change them and see the results in realtime. The HUD displays critical information as an overlay so you can see the resolution, frame rate, codec, timecode, recording status, audio levels, battery meter and more. You can show or hide the heads up display by simply swiping up or down. For example, you can adjust settings such as the recording codec by tapping on the codec name or change the audio levels by touching the audio meters. Everything is interactive, so if you tap any item you can instantaneously change its settings without having to search through confusing menus!
Monitor
Codec
Format
Timecode
Source
Power Status
Professional Scopes
Menus
Transport Controls
Storage Indicators
Audio Meters
On Set Monitoring
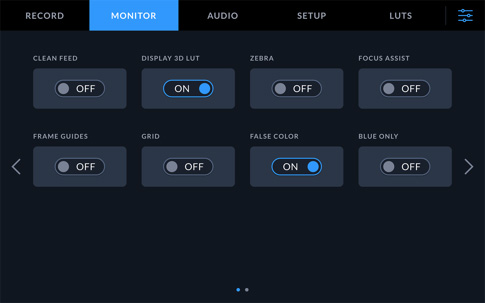
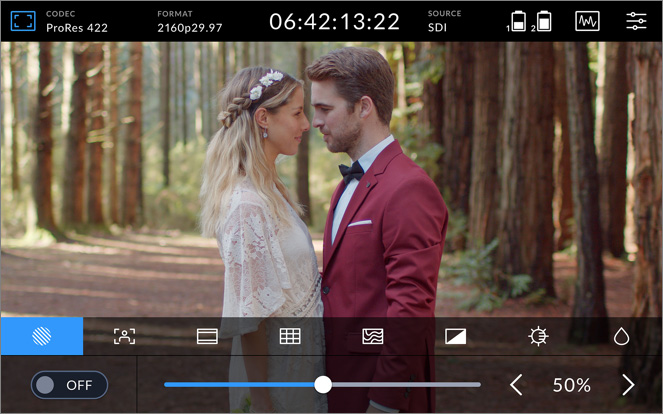
Blackmagic Video Assist lets you turn different monitoring tools on and off with a few simple taps! Tapping the monitor icon brings up an overlay for toggling between and adjusting settings. You can adjust zebra settings for checking exposure, focus assist tools, frame guides, grids, false color and more!
Codec
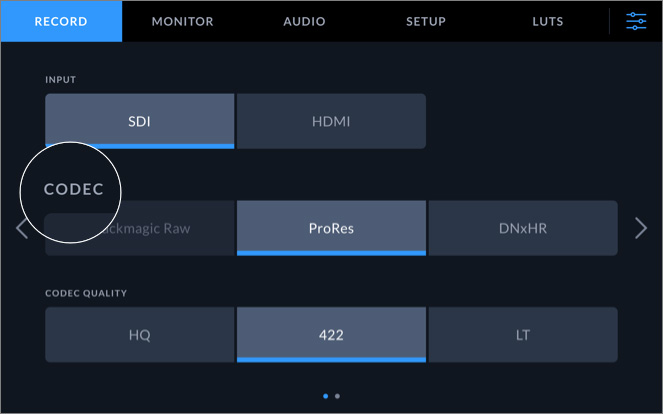
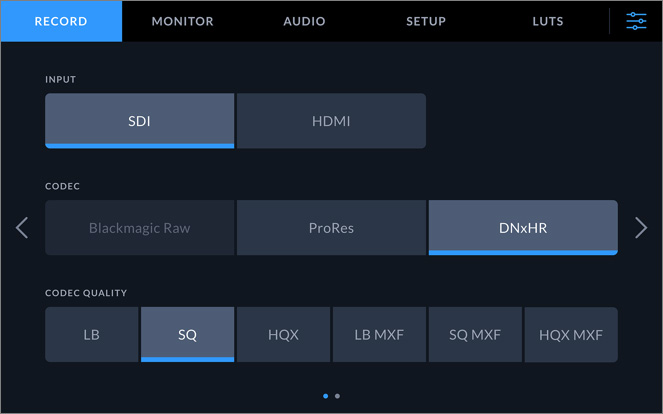
Blackmagic Video Assist lets you record using industry standard Apple ProRes and Avid DNx formats at a variety of quality levels, as well as Blackmagic RAW on supported cameras. You can record full 10‑bit ProRes Proxy, LT, 422 or HQ files, along with DNxLB, SQ or HQX. Blackmagic Video Assist makes it easy to record everything from broadcast quality masters to editorial proxy files!
Format
Blackmagic Video Assist lets you record all standard formats and frame rates. You can record in SD and HD, up to 1080p60 on all models, and on Video Assist 12G HDR models you can record all the way up to 2160p60.
Timecode
The timecode display at the top center has a variety of options that tell you everything you need to know with just a quick glance. You can see the duration of your clips, it turns red when recording, lets you monitor timecode and also features status indicators for time of day timecode and more.
Source
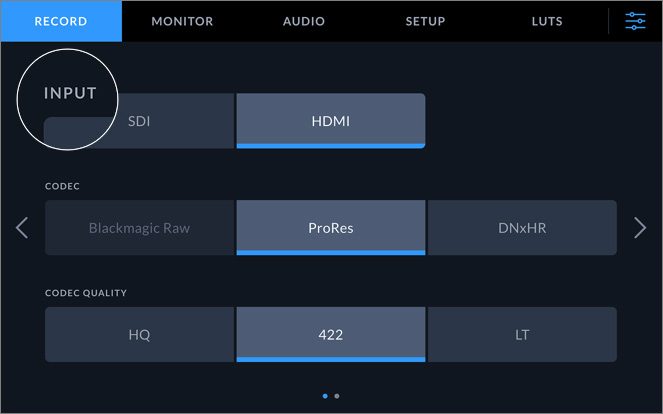
The source indicator in the heads up display tells you which connection is currently being used for the incoming source. Simply tap on the source indicator to switch between SDI and HDMI inputs. You can do it right from the HUD without having to go into any menus!
Power Status
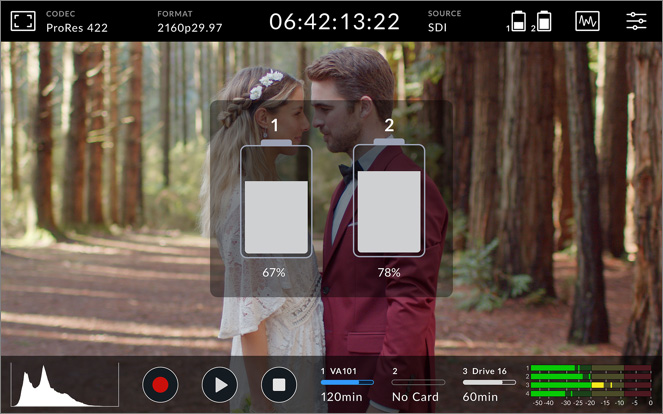
With Blackmagic Video Assist 12G HDR, the battery indicator at the top right of the HUD will show battery life remaining and will say "AC’ when plugged into mains power.
Professional Scopes
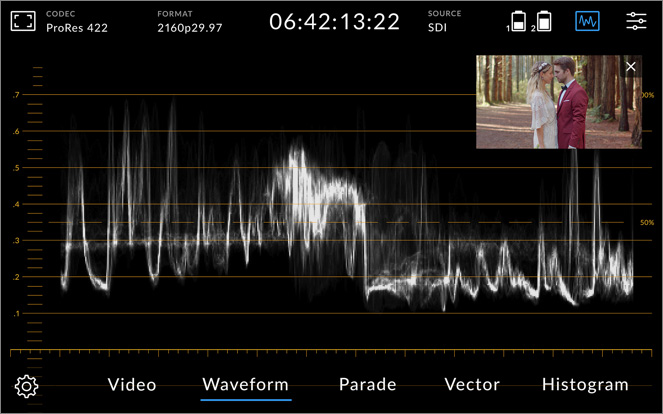
Blackmagic Video Assist includes professional scopes to help you evaluate signal. Tapping on the scope icon at the top right lets you choose between waveform, parade, vector or histogram. Once selected, the scope can be shown as an overlay on top of the video or displayed separately with the video in a smaller window.
Menus
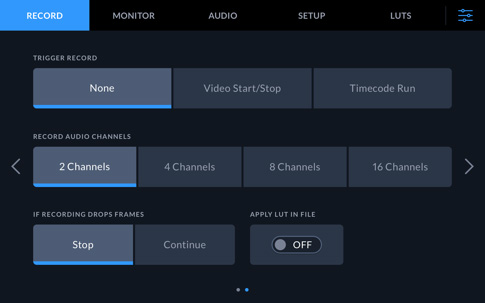
The menu icon at the top right of the heads up display takes you to the main control dashboard which gives you quick access to every single setting and parameter on your Video Assist. The dashboard features easy to navigate tabs for adjusting Record, Monitor, Audio, Setup and LUT settings. Simply tap and swipe to access the controls you need.
Transport Controls
The touchscreen LCD provides dedicated on-screen transport controls that you can use to start and stop recording, review clips, fast forward, rewind and more. There’s a mini timeline with timecode for quickly scrolling through all clips on your media. You can even swipe the image to jog! You also get convenient metadata overlays that show the clip name!
Storage Indicators
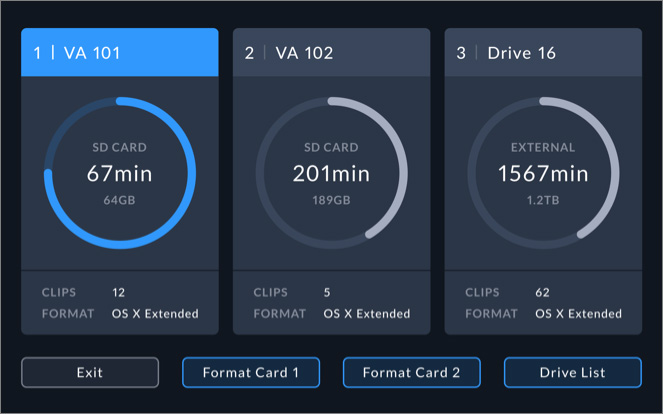
Tapping the storage icons at the bottom of the heads up display will bring up details and status information about your cards and attached USB-C drives. From here you’ll be able to quickly see capacity and how much space is remaining, how many clips are on each card or drive, and how they are formatted. You can also name and re-format cards from this screen.
Audio Meters
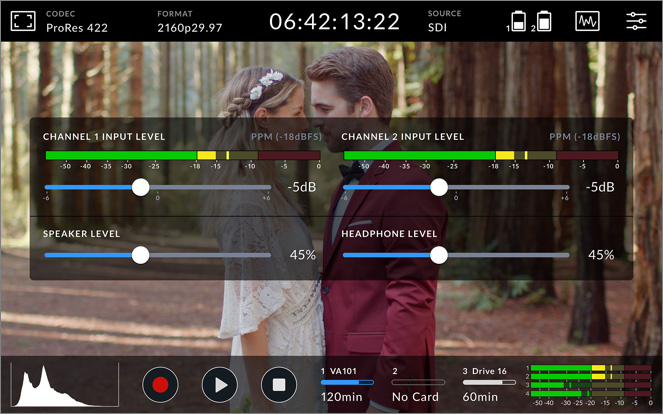
The heads up display features audio meters at the bottom right of the screen for monitoring up to 4 channels with user selectable VU or PPM ballistics. You can quickly adjust input and speaker levels by tapping on the meters which will bring up overlays with larger meters and sliders for each input channel. You can also change input source, pad and phantom power from the Audio dashboard.
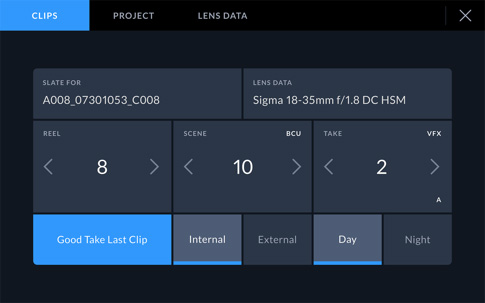
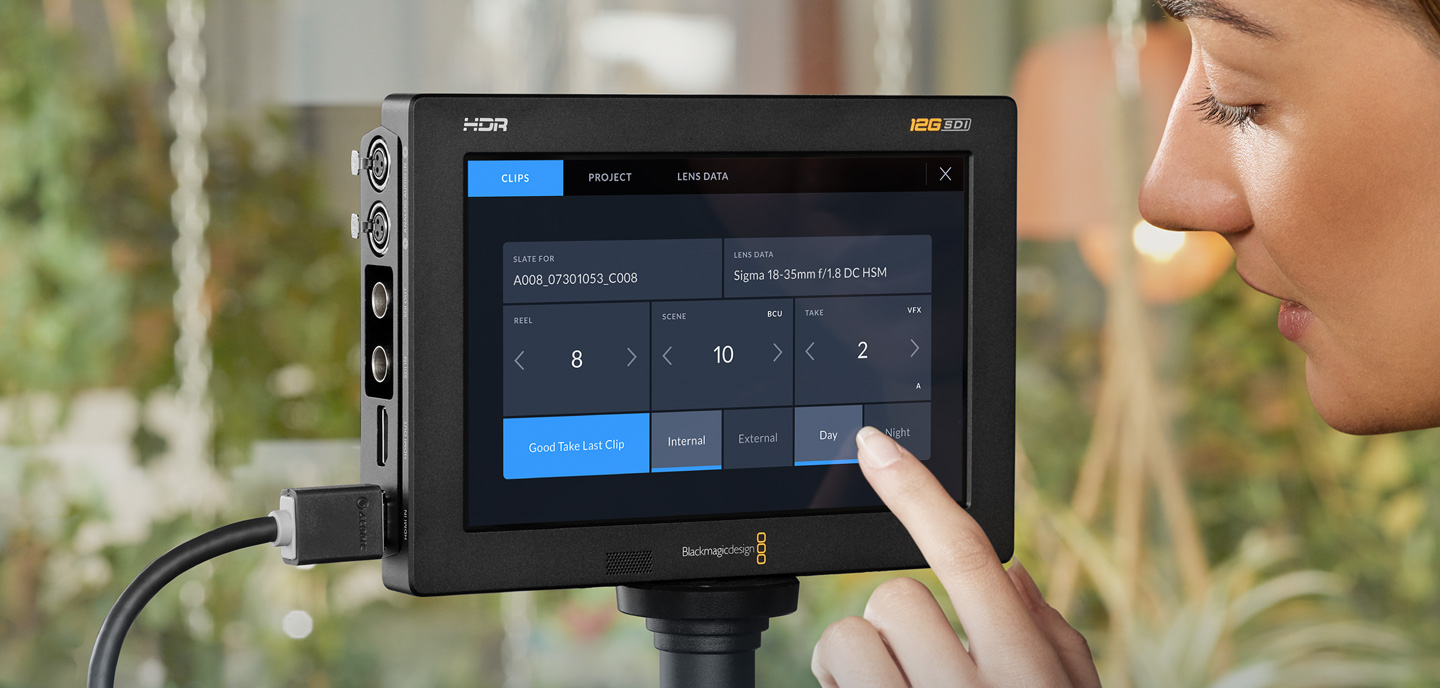
Digital Slate
Direct enter metadata for faster post shoot editing!
The advanced digital slate and metadata features make it extremely fast to add metadata to any shot! Simply swipe left or right from the edge of the screen to bring up the digital slate. Take numbers are automatically incremented when you start and stop recording, so you don’t have to enter them manually for each shot! You can also set reel numbers to increment each time you format a card. All metadata is saved with the files and available in post production with software such as DaVinci Resolve!
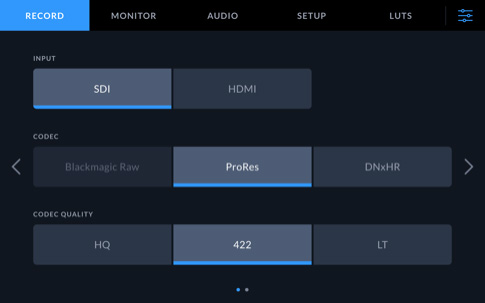
Dashboard
Incredible new dashboard gives you complete control!
All Video Assist models feature an elegant, simple to understand dashboard interface with tabs that give you quick access and complete control over every setting and feature. Simply tap on the record, monitor, audio, setup, or LUTs tab to access everything with just a few taps. The unique design of the interface offers visual consistency that puts items in the same logical order every time so you can quickly learn where settings are and remember how to change them!
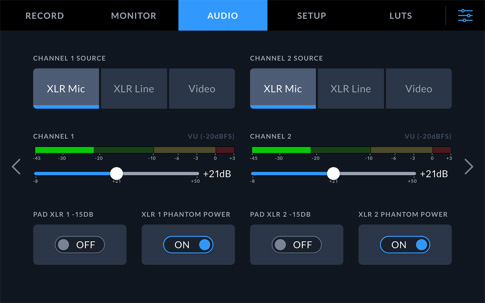
Professional Audio
Adjust audio input and monitoring.
You can quickly adjust audio levels using the HUD, but for complete control over audio settings, you can use the audio tab on the dashboard. Tap to change source inputs for any channel from XLR mic to XLR Line or video. You also get level sliders and realtime meters, along with a pad control for reducing the level on hot sources. When adjusting audio input settings, you can also turn on 48v of phantom power so you can use microphones that are not self powered without an external pre‑amp.
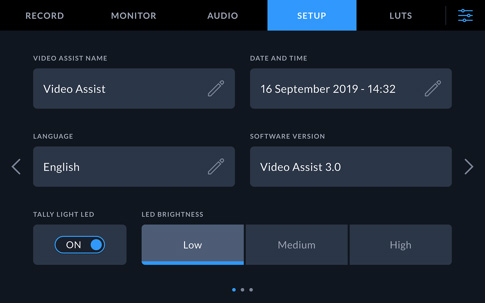
Setup
Fast and easy set up for any job!
Blackmagic Video Assist makes it super fast to get set up and ready for your shoot. The setup tab on the dashboard lets you enter a name for your Video Assist, set the date and time, select the language, turn on tally and adjust the tally light brightness. You can also adjust timecode preferences for drop or non-drop frame timecode and more. The settings tab also features options for setting audio metering ballistics, file naming conventions, 3G SDI Level A and B options, and more!
Built in HDR 3D LUTs
Monitor with different color profiles or film looks!
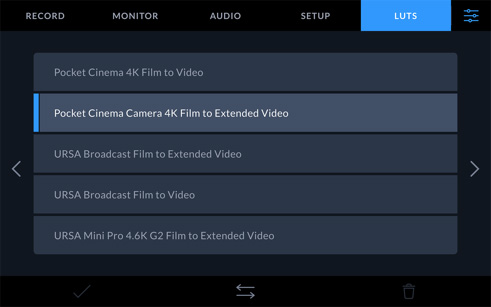
3D color lookup tables (LUTs) are used to adjust the color of the output so the director or cinematographer can see a certain "look" as they’re shooting. LUTs are extremely useful when shooting RAW or when using "film" dynamic range, both of which generally look flat when they’re shot. LUTs are used to give you a better idea of what the footage will look like after it has been color corrected in post production. Blackmagic Video Assist can apply 3D LUTs for viewing on the LCD touchscreen, making them ideal for high end feature film and television production. In addition to the built in LUTs, you can also load and store your own 33‑point 3D LUTs, up to a total of 25 on the 7” model and 20 on the 5” model.

