
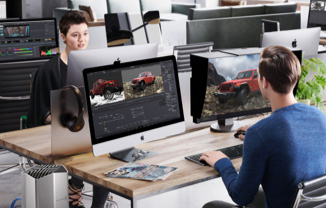
Complete Media Management and Delivery
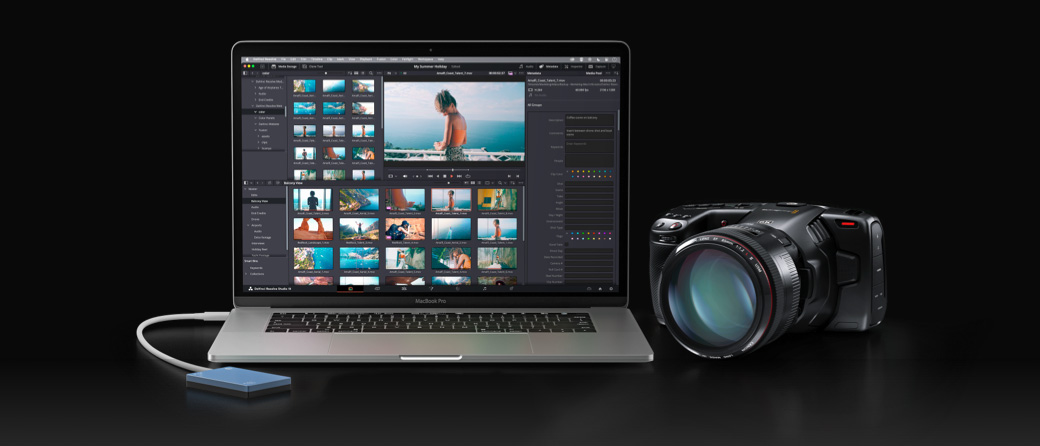
All projects start with importing and organizing footage, and they all end with mastering and final output. DaVinci Resolve features powerful tools designed to let you get to work quickly and output files fast, so you’ll never miss a deadline. Its incredibly wide format support makes it compatible with virtually every modern file format and media type in the world, including Blackmagic RAW, making it the ideal hub for your post production workflow. When it comes to delivery, DaVinci Resolve lets you export and upload directly to YouTube, Vimeo, and TikTok, create broadcast masters for television and streaming services, or even create digital cinema packages for theatrical distribution!
Organize and Sync Footage
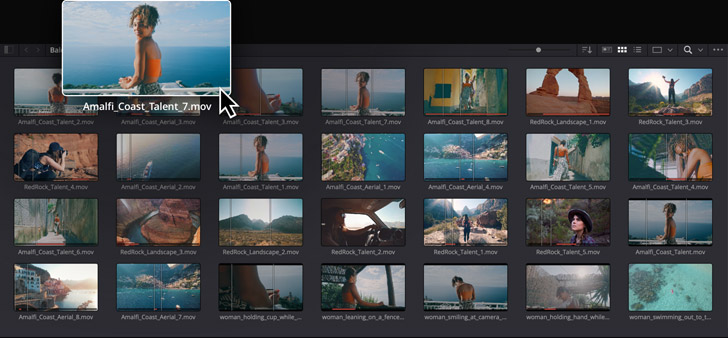
The media page is a dedicated workspace for importing, organizing, syncing footage and adding metadata. The top of the screen displays the hard drives connected to your system, while the bottom of the page displays footage in the current project. To import footage, drag it from the drives at the top into the project’s media pool at the bottom. The viewer lets you preview footage before adding it to your project and the metadata inspector can be used to view or edit metadata. You can make source side adjustments, such as adding a LUT before editing. The media page can also be used to clone and backup camera media, sync separately recorded audio and video, and even extract audio from clips!
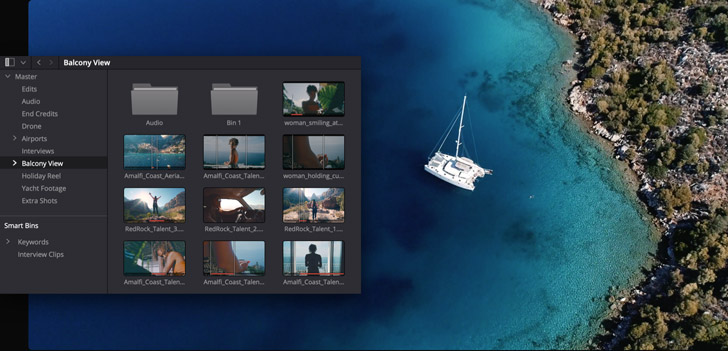
Bins and Smart Bins
Bins are folders that you create in the media pool to organize footage. You can create bins just like you create folders on the hard drive, then drag footage into them as desired. Standard bins let you organize footage however you’d like. Smart Bins use metadata to automatically organize your clips and are always kept up to date as new footage is added to your project. Power Bins are visible across all the projects on your system, making them perfect for re-usable assets such as graphics, logos, titles, clips and more. The DaVinci AI Neural Engine even lets you organize media based on faces detected in your footage! Bin views can be customized and you can open as many bin windows as you need!
Sync Audio and Video
The media page includes tools for syncing audio recorded from separate sources with your video files. Just select the audio and video clips and use the sync command. You can sync based on timecode or by audio waveforms. In addition, you can manually sync audio and video by moving the playhead to a frame in the picture viewer, moving the playhead to a frame in the audio viewer and clicking on the link button. Best of all, you don’t have to render new media. Resolve manages it all for you, merging the audio, video and metadata from the files so you can start editing immediately! In addition to syncing on the media page, you can also now sync audio and video clips on the edit page timeline!

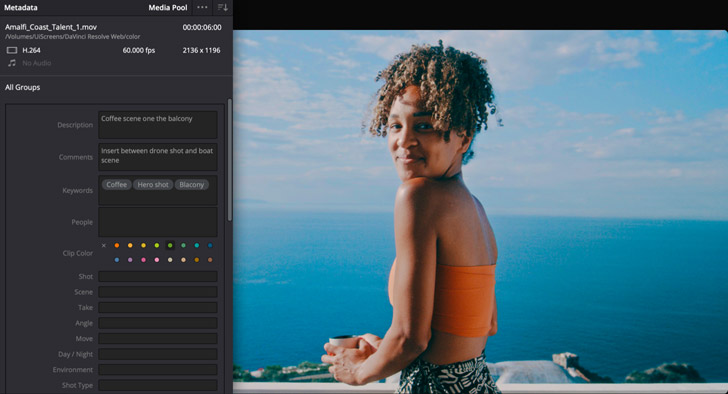
View and Edit Metadata
The media page includes an inspector to view and edit over 200 different metadata parameters for every clip! DaVinci Resolve works with both file and frame level metadata. Metadata is automatically imported, plus you can enter your own custom keywords and tags. Footage can be sorted into smart bins based on any criteria. There are pre-defined metadata groups you can view to quickly see camera information, production details, audio and more. You can also create your own unique sets of metadata to create custom metadata views. Metadata tags can even be used to change the display names for clips using scene, shot and take information. That means you’ll never have to rename media files again!
Clone and Backup Camera Media
Backing up camera media cards on set while you’re shooting is critically important. You need to make sure with 100% certainty that you have verified working backups before erasing and re-using camera cards. DaVinci Resolve is perfect for use on-set because the clone tool lets you quickly clone camera cards, mags and folders, complete with checksum verification. This lets you create backups of mission critical camera media with confidence before erasing the media and recording over it. The clone tool makes bit for bit copies with checksum verification of media cards, SSDs and mags from cameras. For maximum protection, you can save multiple copies to different destinations at the same time!
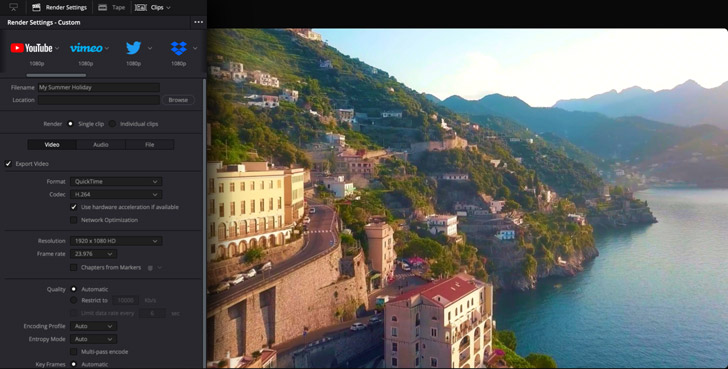
Quick Export
The Quick Export option is the fastest way to deliver a file. To output your program, go to the file menu and select Quick Export for one click access to the most popular delivery options. If you have entered your account information in DaVinci Resolve’s preferences, quick export will render and upload the finished video to your YouTube, Vimeo or TikTok accounts in a single step! There are also options for creating ProRes masters, exporting H.264 and H.265 files, or exporting audio only. You can also create your own customized presets that will show up in the quick export window. Simply switch to the deliver page, adjust your audio and video output settings, and save it as a new preset!
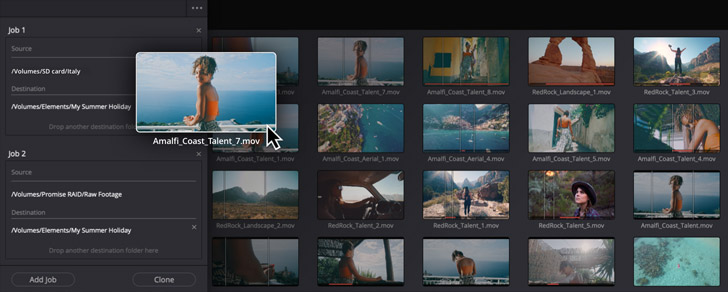
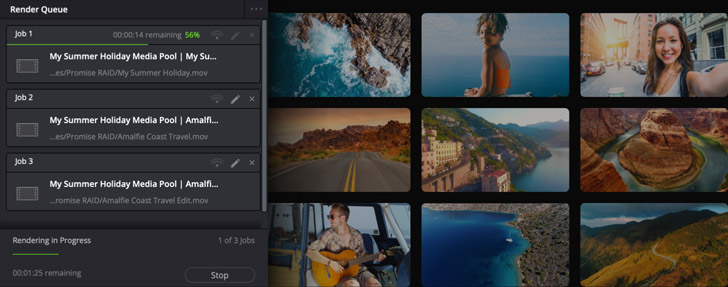
Queue and Output Multiple Jobs
When you need to output multiple jobs at once or multiple versions of the same job, the deliver page lets you batch process or even offload rendering to another system! The render queue is where you line up projects to be output. You can quickly add multiple timelines or clips to the render queue for batch processing. Simply create each job, click the "Add to Render Queue" button and then start the batch. Jobs can be output as audio and video, audio only, or video only. If you’re working on a network with DaVinci Resolve Studio, you can offload the rendering of projects and jobs to another workstation. That means you can render on another system while continuing to work on your system!
